This issue was a tough one. It is basically the same as issue 33 and despite having the experience of doing it once already, it still took a lot of time and energy to complete. This issue also used so many different tools and supplies (including: scissors, a punch, white glue, a needle, thread, a hammer, a hole punch, instant gel glue, 500 grit sandpaper, a black pen, masking tape, clothespins, a copy of issue 33, toothpicks, sellotape, and a hard rubber plate) it felt more like working on three issues instead of just one.
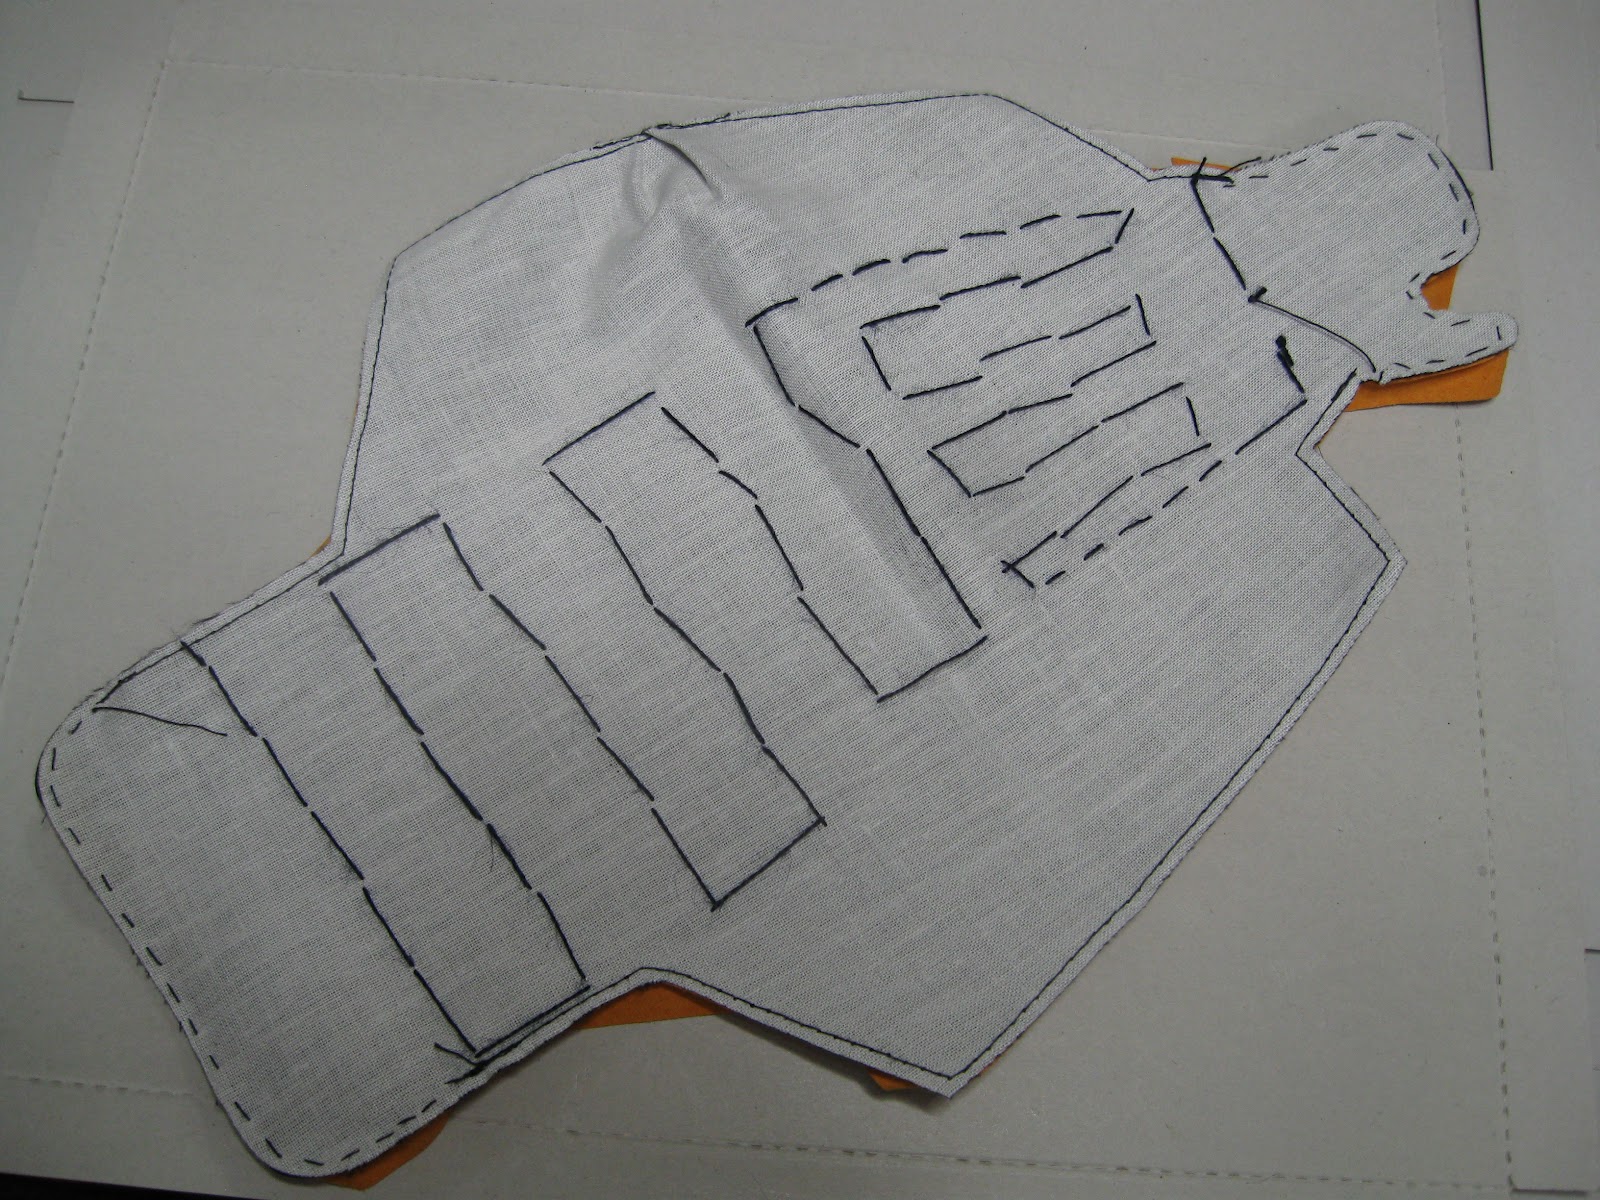
First I added the wrist strap and then I glued and stitched the blue backing on the sleeve, next I glued and stitched the leather section in place. After that I punched holes along the edges and laced the sides together. I recall this final step gave me a lot of trouble before, but fortunately now it all came together correctly the first time.
The next issue is one that worries me because it's another copy of issue 34. That was the most difficult issue I have done and I'm not anticipating it becoming any easier the second time around.
March 09, 2012
March 05, 2012
Issue 42
In this issue I attached the armoured parts to the silk section of the sleeve. This involved a lot of stitching. First I anchored the top and hand sections down, then I carefully attached selected links in the chainmail. Enough to keep the chainmail loose, but not fully detached from the sleeve. This was made difficult for the same reasons as before; combining black thread, black metal links, and black silk makes it hard to see exactly what you are doing. However, compared to when I did the same section on the other arm, this time it was completed faster. I hope that continues to hold true for the next few issues because they were very difficult the first time I did them.
February 23, 2012
Issue 41
This issue was rather simple. I have worked with chainmail parts several times before and this issue was not very different from what I did in issue 31. First I attached the thumb section to the hand guard by using some left over links from previous chainmail parts. Then I shaped and attached a larger section of mail to the back of the hand guard. Finally I attached that to the existing right forearm guard from issue 38.
I think I have finished all the armour and chainmail sections of this arm piece. Next I'll attach it to the leather and silk backing. Although this looks like something I have done before, and despite having the experience of already completing this once, I am still anticipating a lot of little work to finish it again.
February 20, 2012
Fifteen to finish!
When working on this Samurai armour project I've always been working a few issues behind the current one. I took a long break shortly after I started, and another one recently. These rests have created a backlog of unfinished issues because every other week another two issues are added to the 'to-do' pile. Although this gap between my working issue and the current issue has grown and shrunk, it has always remained.
However, that is now going to end. A few weeks ago I received the final issue. It is actually a bit larger than the others, and it makes a nice visual end for this project. From now on, when I complete an issue I am moving one step closer to the finish. I am about to start issue 41, and that means I only have 15 to do until I am done.
I'm now closer to the last issue than I was to the first when I started this blog.
Issue 40
Regular readers may note the similarity between this issue and issue 35. This armour set, like the body it is designed to protect, is made with a few parts that are mirror opposites. I am referring to parts such as the left and right arm, and shin, guards. These parts are, or will be, reversed copies of each other.
However, as near as I can determine this part, the other upper leg guard, is totally identical to the first one I was just working on. The parts are the same size, cut, and stitched in the same manor. Also, like I said about issue 35, there is not much more to say about this piece.
February 19, 2012
Issue 39
This issue was not overtly complex, but it was rather time consuming. For this issue I had to assemble and attach the final two strips of armoured plates to the leg guard. As I've made several of these before it was a known process for me. After that I stitched along the edges of all the strips to prevent them from coming loose or flipping over.
When that was complete I glued the backing in place and then I glued the leather trim down along the edges. Once the glue had dried I began the longest step in this issue, the process of securing the trim it in place with close tiny stitching.
It occurred to me that with both the backing and trim already held in place with glue the added stitching is probably not a significant boost to the structural integrity of the part. This armour is destined to be placed on display and not actually worn, so the glue alone should be sufficient. Furthermore, considering the location of the stitching, it will likely not be visible in the final product. Thus further diminishing the necessity of spending so much time stitching the parts together.
After I had fully considered this, I did it anyway.
Subscribe to:
Posts (Atom)