March 31, 2012

Issue 51

This was a very difficult issue to finish. I can't decide if it was the most, but it certainly ranks near the top, and in theory it should not have been so complicated.

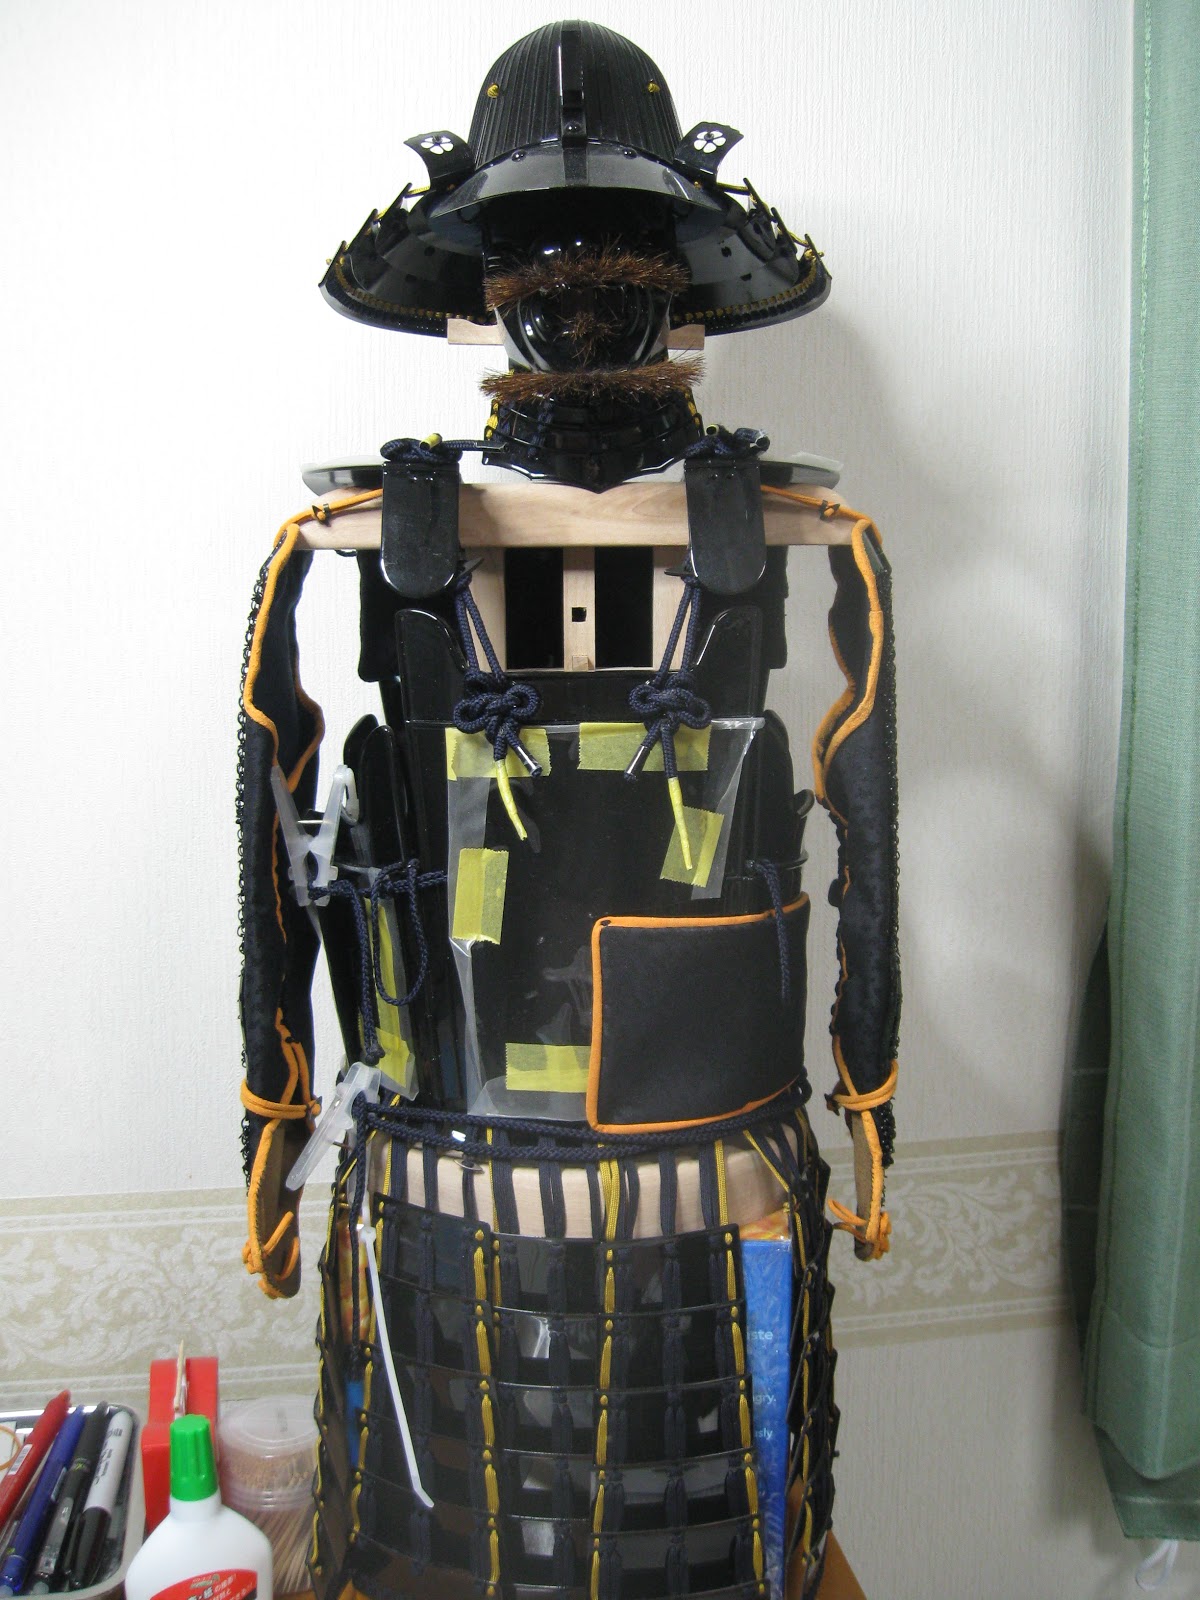
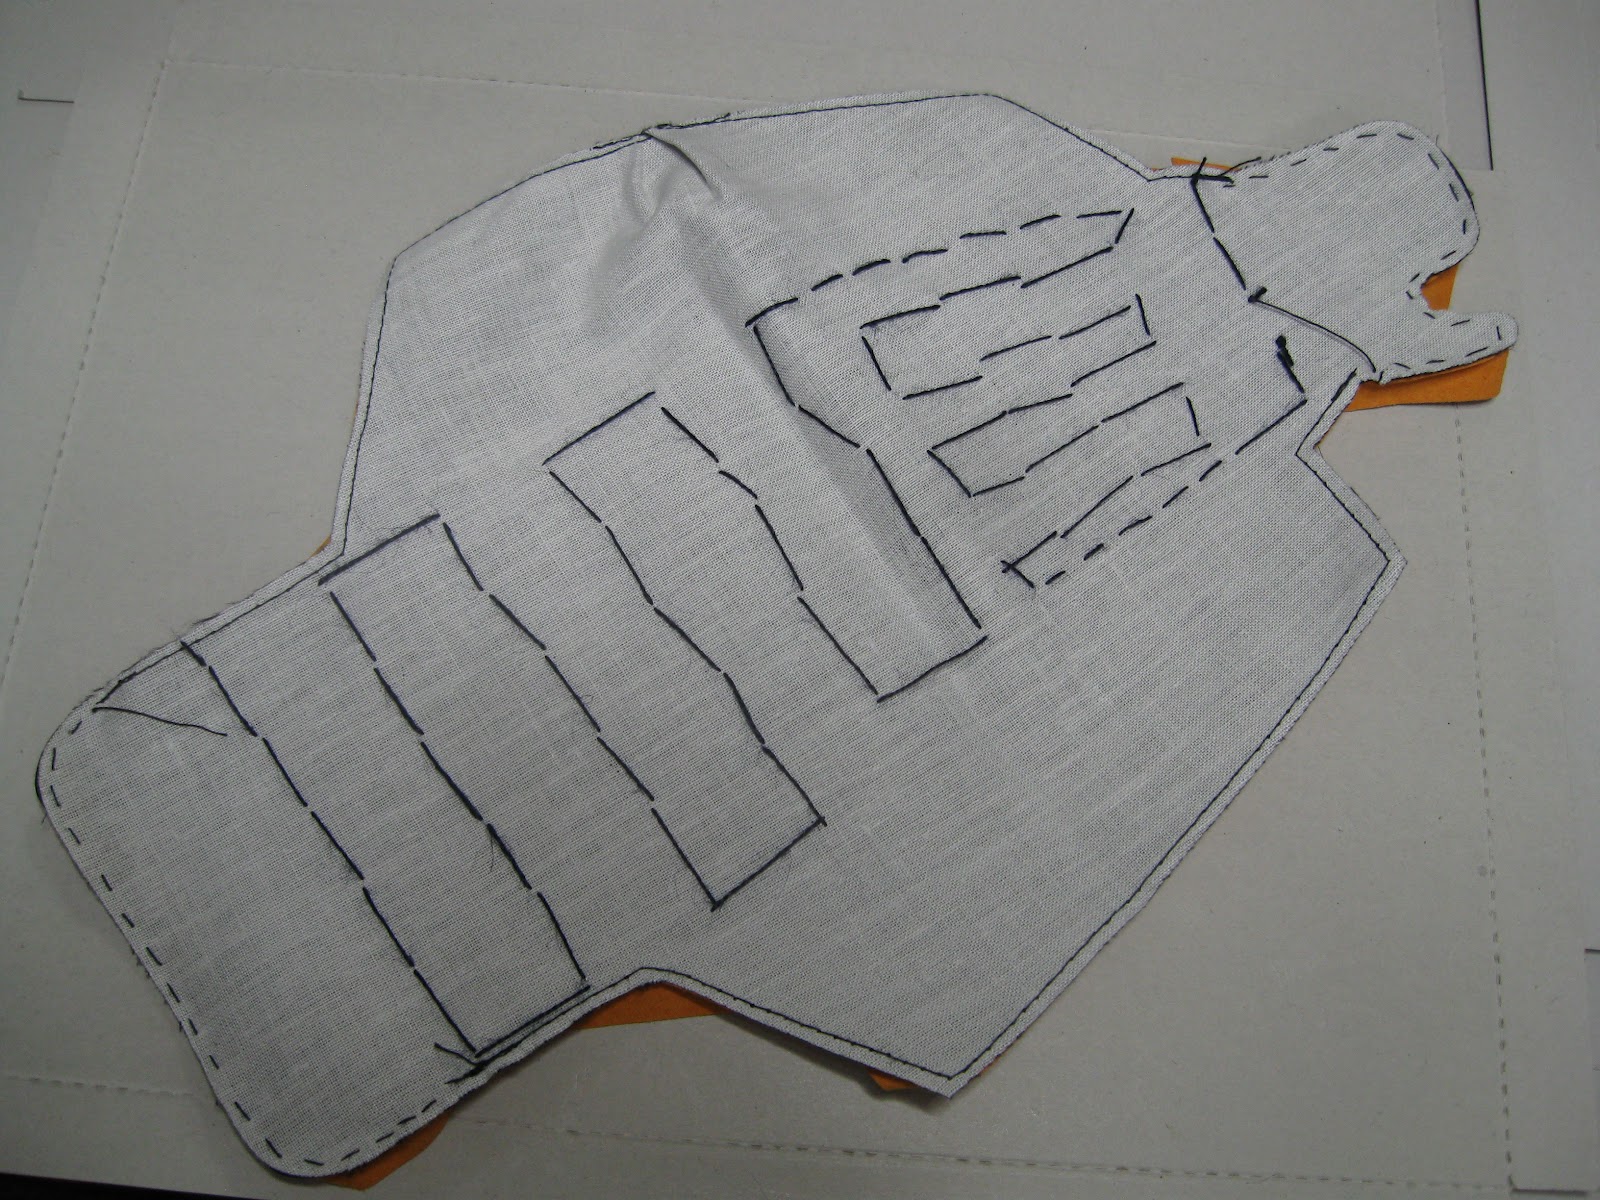
I first had to attach the armoured section to the silk backing. This is similar to what I have done with both the sleeve and thigh parts. However, on those parts I was working with thread and 4mm silk string,  while this time I was using 5mm silk string. I know that may not seem like much of a difference but this string got twisted quite easily and I felt it was more difficult to work with. Also, I think I attached the armoured plates together a bit too tightly. When bending the parts into place the tension in the string was quite high. In retrospect I think adding a little slack to the line would have helped the process quite a bit.

Further complicating matters was a section of leather covering about a quarter of the backing. Making holes in this and then threading the silk string through was quite difficult. The tip of the silk string is just held together with glue and that would often come apart when working on this section. This would delay the process while I fixed it and waited for the glue to dry again.

Finally, once the armour had been attached, I secured the straps in place and then glued on the backing. Of course to finish the process I also stitched the entire backing in place. Now the left shin guard is complete. In the next few issues I will begin to work on the right shin guard. I don't imagine it will be much easier, but at least I'll know what to expect.


March 25, 2012

Issue 50

This issue finished the thigh guards and it was made of several small steps. First I threaded the leather cord through the small patch I put on in the last issue. Next I made another 'knot' before securing the whole thing in place with glue and finally stitching it in place.

The other steps were to attach the buttons to the tabs on back of the piece. This it was a simple process as I have made similar parts several times on other areas of the armour, although this part was a little different. Usually this kind of thing is comprised of a button section and a second 8 shaped part, except time there was no second piece, and this makes it a little hard to keep the buttoned sections closed. However, as it's on the back on the thigh pads, and that part is unseen, I could just use a clothespin or something to keep the tabs closed.

Next issue I'll finish the left shin guard and begin the final five.


March 24, 2012

Issue 49

This issue was a fun change of pace, it was hand stitching again. I almost think I should rename my blog to "Sewing Samurai Armour" because I spend so much time with a needle and thread. The only pieces included in this issue were a long silk ribbon and a small leather patch.

First I sealed the ends of the silk with some glue then I had to first align the two thigh guards and joined them together. Next I sewed the silk ribbon to the front, carefully folded it over the top, and finally sewed it down on the back. For the last part of this issue I carefully measured and marked where to put the holes on the leather patch, I used my punch to make the holes, and then I glued it in place.

Next time I'll finish the details on the thigh guards.

March 22, 2012

Issue 48

This issue was not too difficult. It was a lot like the previous issue, but with a small twist. First I joined another two sections of the shin guard, then I started to attach this section to the parts from the other issues. Although it was more complex than average, I did not find it too demanding. This work required a degree of skill, and that skill is something I have developed while constructing this project. Unfortunately, in the future I can't foresee any circumstance where I'll need to use these skills again, so I'm doing my best to use them now.

March 20, 2012

Issue 47

There is not much to say about this issue. it was very similar to the final section of the previous issue, however this time there were less steps to complete it.

I used two short sections of the silk string from the previous issue to join these two parts. I wish I could say more, but that's all there was to do this time. Next, I will be joining two more parts of the shin guard, and then joining all the sections together.

March 19, 2012

Issue 46

There were a lot of little steps to finish this issue and although none of them were really complex, some were time consuming. First I finished the final two strips of armoured plates and I attached then to the thigh guard. This step yielded an unexpected development, I discovered that an extra armour plate had been included. I double checked my guide to insure this was not a mistake, but indeed it was. I have no idea what to do with this tiny keepsake, perhaps I'll make a phone strap out of it later.

Anyway, after completing the final two strips I again glued and stitched a backing to the thigh guard. Although not a difficult a task, it does take some time to finish. With that done I began the final step of the issue, to start working on the shin guard. Two metal plates and a length of silk string were also included in this issue and I had to bind the parts together. Although this step had a similar feel to the many metal plates I attached together on the body of the armour, it was not the same.

For the next few issues I'll continue to work on this shin guard before returning to the thigh guards. Also this issue included 250cm of 5mm silk string, and I only required 60cm to finish this issue. I will be using the remainder in the next few issues.


March 13, 2012

Issue 45

Really not much to say here. I made two more strips of small armoured plates and then I attached them to the thigh guard.

I fell this issue may be the last simple one and the next few will begin to involve a lot more complex instructions and many time intensive steps. I have only ten more to go and there is still lot of armour left to be built.

March 11, 2012

Issue 44

This issue was a true surprise. Although the work did match what I was expecting, the process was quite the opposite. When I completed the left sleeve in issue 34 I had so much difficulty with threading the leather cord through the holes in the armoured plates.

However, for this issue the instructions included one tiny change: rather than cutting the cord square, it's cut on an angle. This apparently minor alteration had a major effect on the work. It was much easier to thread the cord through the holes because the the thin edge could fit in the narrow gap much easier, and once it was about halfway in I could grab it with my pliers and pull the rest through. This greatly cut the time need to make this part.

The rest of the steps to finish this issue were not overly complex. I once again made two 'knots' in the cord on the back of the hand guard that are actually just twisted and held in place with glue. Once I finished the removable joint section at the top I closed the sleeve by gluing the backing down and then stitching it shut. To finish the issue I attached the other half of the removable joints to the main body of the armour.

In the next few issues I'll continue to work on the thigh guards and soon I'll start the shin guards.


March 09, 2012

Issue 43

This issue was a tough one. It is basically the same as issue 33 and despite having the experience of doing it once already, it still took a lot of time and energy to complete. This issue also used so many different tools and supplies (including: scissors, a punch, white glue, a needle, thread, a hammer, a hole punch, instant gel glue, 500 grit sandpaper, a black pen, masking tape, clothespins, a copy of issue 33, toothpicks, sellotape, and a hard rubber plate) it felt more like working on three issues instead of just one.

First I added the wrist strap and then I glued and stitched the blue backing on the sleeve, next I glued and stitched  the leather section in place. After that I punched holes along the edges and laced the sides together. I recall this final step gave me a lot of trouble before, but fortunately now it all came together correctly the first time.

The next issue is one that worries me because it's another copy of issue 34. That was the most difficult issue I have done and I'm not anticipating it becoming any easier the second time around.


March 05, 2012

Issue 42

In this issue I attached the armoured parts to the silk section of the sleeve. This involved a lot of stitching. First I anchored the top and hand sections down, then I carefully attached selected links in the chainmail. Enough to keep the chainmail loose, but not fully detached from the sleeve. This was made difficult for the same reasons as before; combining black thread, black metal links, and black silk makes it hard to see exactly what you are doing. However, compared to when I did the same section on the other arm, this time it was completed faster. I hope that continues to hold true for the next few issues because they were very difficult the first time I did them.